
Welcome back to our series on home recording for musicians. In this post, we’ll guide you through the process of recording vocals at home, providing you with tips and techniques to achieve professional results. The goal is to create a quality vocal recording that can be professionally mixed at Jeddraudio Recording Studio.
Best Practices for Home Vocal Recording
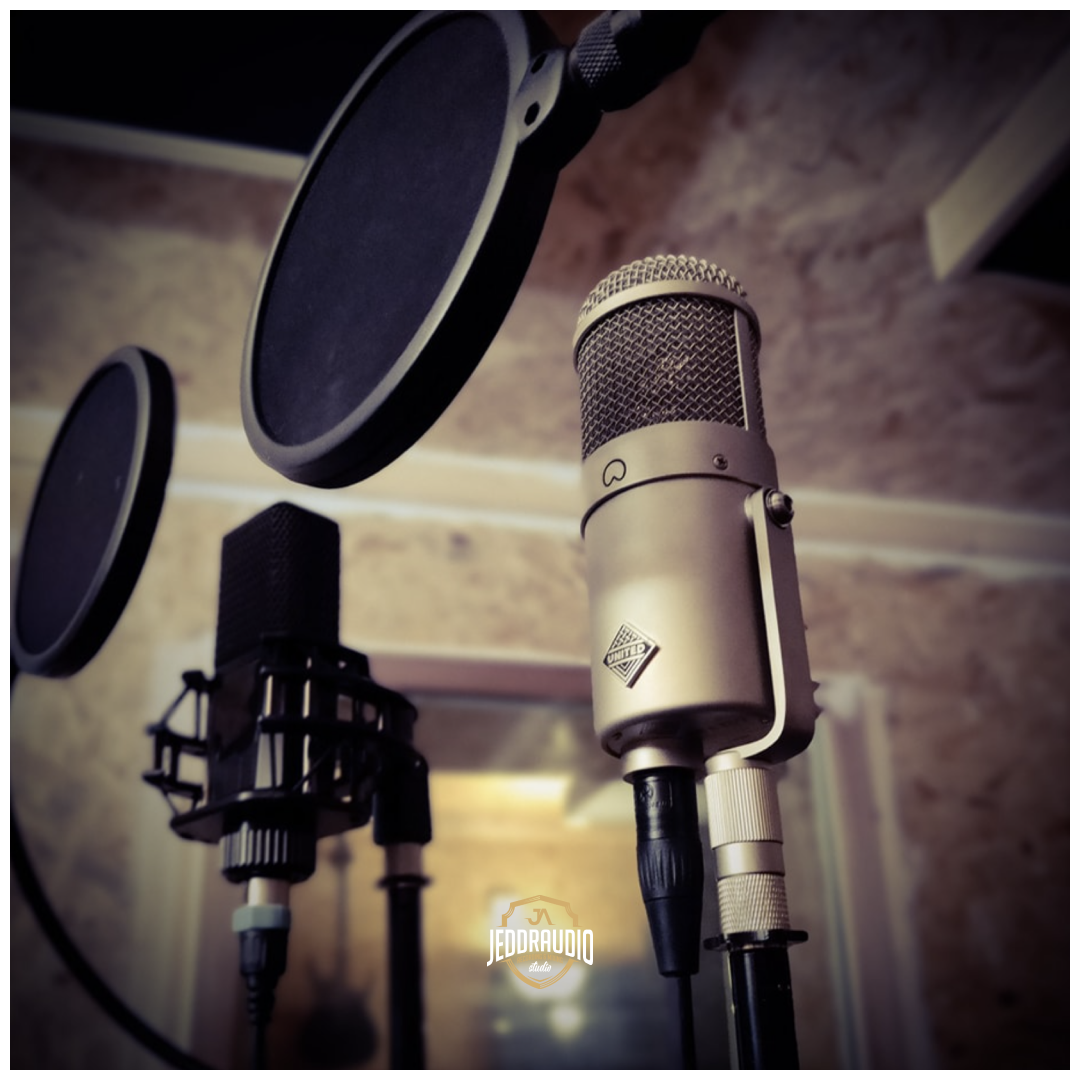
Microphone Selection
Choosing the right microphone is crucial for capturing high-quality vocal recordings.
- Large-Diaphragm Condenser Microphone: Use a large-diaphragm condenser microphone for recording vocals. These microphones are sensitive and accurate, capturing the nuances and details of your voice.
- Microphone Placement: Position the microphone at mouth level, slightly off-axis to avoid plosives and sibilance. Use a pop filter to reduce plosives and a reflection filter to minimize room reflections.
- Microphone Technique: Maintain a consistent distance from the microphone while recording, typically around 6-12 inches. This helps to ensure a consistent and balanced sound.
Recording Environment
Creating a suitable recording environment is essential for achieving a professional vocal sound.
- Choose a Quiet Room: Select a room that is as quiet as possible, away from external noise and distractions.
- Use Acoustic Treatment: Use blankets, pillows, or foam panels to minimize reflections and control the room’s acoustics. This helps to reduce unwanted echo and reverberation.
- Carpeted Room: If possible, record in a carpeted room to minimize reflections and create a more controlled acoustic environment.
Performance Tips
- Warm-Up: Spend time warming up your voice before recording. This helps to improve your vocal range, flexibility, and tone quality.
- Hydration: Drink plenty of water to stay hydrated and maintain vocal health. Avoid caffeine and alcohol, as they can dehydrate the body and affect vocal performance.
- Record Multiple Takes: Capture several takes of your performance to have options during the mixing stage. This allows you to choose the best take or comp different takes for a flawless performance.
- Use a Pop Filter: A pop filter helps to reduce plosives and sibilance, ensuring a clean and professional vocal sound.
Conclusion
Recording vocals at home can be a rewarding experience, and by following these best practices, you can achieve professional results. Choose the right microphone, create a suitable recording environment, and focus on your performance to capture high-quality vocal tracks. Keep things simple and avoid over-complicating the process, and you’ll be well on your way to creating great-sounding vocal recordings at home.
Stay tuned for the next post in our series, where we’ll explore recording keyboards and synthesizers at home.

