
Welcome to our series on preparing for a successful recording session. In this post, we’ll focus on bassists and provide essential tips on achieving the perfect tone for studio recording. A well-crafted bass tone can greatly enhance the quality of your recordings and contribute to a more efficient and enjoyable studio experience.
Introduction
Recording in a studio offers a unique opportunity to capture your music at its best. For bassists, this means ensuring that your instrument and amplifier are set up to achieve the perfect tone. A well-prepared bass tone can make a significant difference in the quality of your recordings and help you achieve the sound you’re aiming for.
Selecting and Setting Up Your Bass and Amplifier
Choosing the Right Bass
The type of bass you choose can greatly impact the sound of your recordings. Different basses have unique tonal characteristics, so select one that complements the style of music you’re recording. Consider factors such as the type of wood, pickups, and electronics, as these can all influence the overall sound.
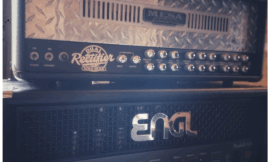
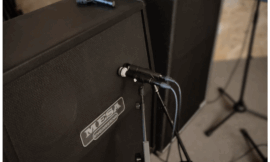
Setting Up Your Amplifier
Selecting the right amplifier is equally important. Different amplifiers have unique tonal characteristics and features, so choose wisely. Experiment with different settings and configurations to find the sound that works best for your recordings.
Tips on String Selection and Maintenance
Choosing the Right Strings
The type of strings you choose can greatly impact the playability and tone of your bass. Consider factors such as the material, gauge, and coating (no coating would be the dream scenario, here!), as these can all influence the overall sound and playability.
Maintaining Your Strings
Proper string maintenance is essential for achieving the best possible tone and playability. Regularly clean your strings with a soft cloth to remove dirt, oil, and sweat, which can cause corrosion and affect the sound. Additionally, consider changing your strings before a recording session to ensure optimal tone and performance. Five year old strings are not the best starting point, basically.
Ensuring Optimal Playability and Tone
In addition to selecting and maintaining your strings, there are other factors to consider for achieving optimal playability and tone. These include:
- Setting the Action: The action refers to the height of the strings above the fretboard. A lower action can make the bass easier to play, while a higher action can provide a fuller tone. Experiment with different action heights to find the balance that works best for you.
- Adjusting the Intonation: Intonation refers to the accuracy of the pitch produced by each string at various points along the fretboard. Proper intonation is essential for ensuring that your bass plays in tune and sounds its best. Use an electronic tuner to check and adjust the intonation as needed.
- Setting the Truss Rod: The truss rod is a metal rod that runs along the inside of the neck and helps to stabilize it against the tension of the strings. Adjusting the truss rod can affect the relief (the slight bow) of the neck, which in turn can influence the playability and tone of the bass. Consult a professional or refer to the manufacturer’s guidelines for adjusting the truss rod.
Techniques for Practicing and Preparing Your Parts
Locking in with the Drummer
One of the primary roles of the bass in a band is to lock in with the drummer and create a solid rhythmic foundation. To achieve this in the studio, it’s essential to practice and prepare your parts with the drummer. This can involve:
- Rehearsing Together: Schedule regular rehearsals with the drummer to work on your parts and build chemistry. This will help you develop a tight and cohesive rhythm section that drives the music forward.
- Using a Metronome: Practicing with a metronome is crucial for developing a solid sense of timing and ensuring that your performances are tight and accurate. This is especially important in the studio, where precise timing is essential.
- Recording and Reviewing Your Performances: Recording your practice sessions and performances can be a valuable tool for identifying areas that need improvement and tracking your progress over time. Listen back to the recordings and take notes on what’s working well and what needs further refinement.
Focusing on Tone and Dynamics
In addition to locking in with the drummer, it’s essential to focus on your tone and dynamics when practicing and preparing your parts for the studio. This can involve:
- Experimenting with Different Tones: Try out different tones and settings on your bass and amplifier to find the sound that works best for the style of music you’re recording. Consider factors such as the EQ, gain, and effects, as these can all influence the overall tone. Make sure you search for your tone while all other instruments are playing. The ensemble of the band defines your optimal tone.
- Practicing Dynamics: Dynamics refer to the variation in volume and intensity in your playing. Practicing dynamics can help you create a more engaging and expressive performance, as well as ensure that your parts sit well in the mix. Experiment with different levels of volume and intensity, and practice transitioning smoothly between them.
Communicating with Your Producer and Engineer
Before the recording session, communicate with your producer and engineer about your sound and any specific preferences or requirements you have. This will help them understand your vision and make informed decisions throughout the recording process. Be open to their feedback and suggestions, as they can provide valuable insights and guidance for achieving the best possible sound.
Conclusion
Achieving the perfect bass tone for studio recording involves a combination of selecting the right instrument and amplifier, maintaining your strings and setup, and practicing and preparing your parts. By following the tips and techniques outlined in this post, you can ensure that your bass sounds its best and contributes to a successful and enjoyable studio experience.
Stay tuned for more blog posts in our series on preparing for your recording session. Next up, we’ll be focusing on guitarists and how to prepare their gear and performance for the studio.